Next2Connect Administration Panel - Initial Setup
Overview
Once the AWS configuration is complete, log in to the Next2Connect Administration Panel using the credentials you set up during purchase (e.g. via AWS Marketplace).
Organizations and Tenants
Before configuring, it's useful to understand the platform hierarchy:
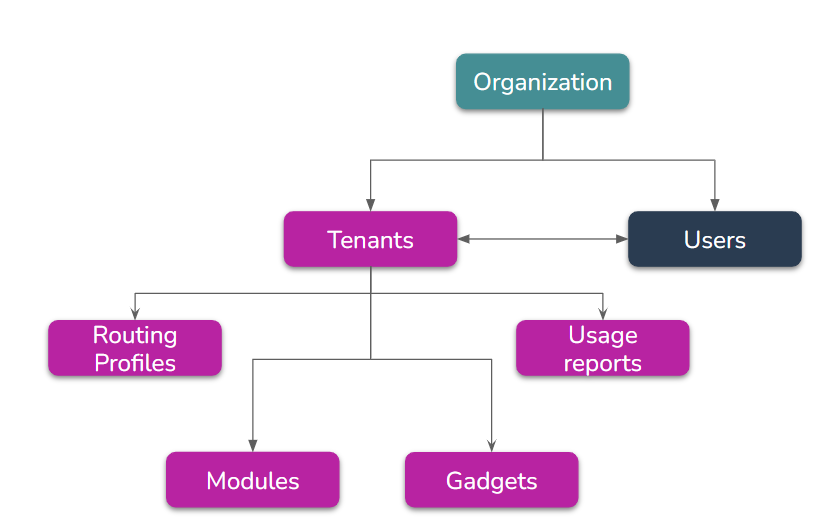
Organization is the top-level entity. It is the private space that governs access methods, tenants, users, and enabled applications. Each organization has a unique identifier assigned at activation time.
Tenant is the equivalent of "company" within an organization - it represents your company's private environment. A single organization can contain multiple tenants, enabling granular access control.
After login, the Administration Panel displays the dashboard:
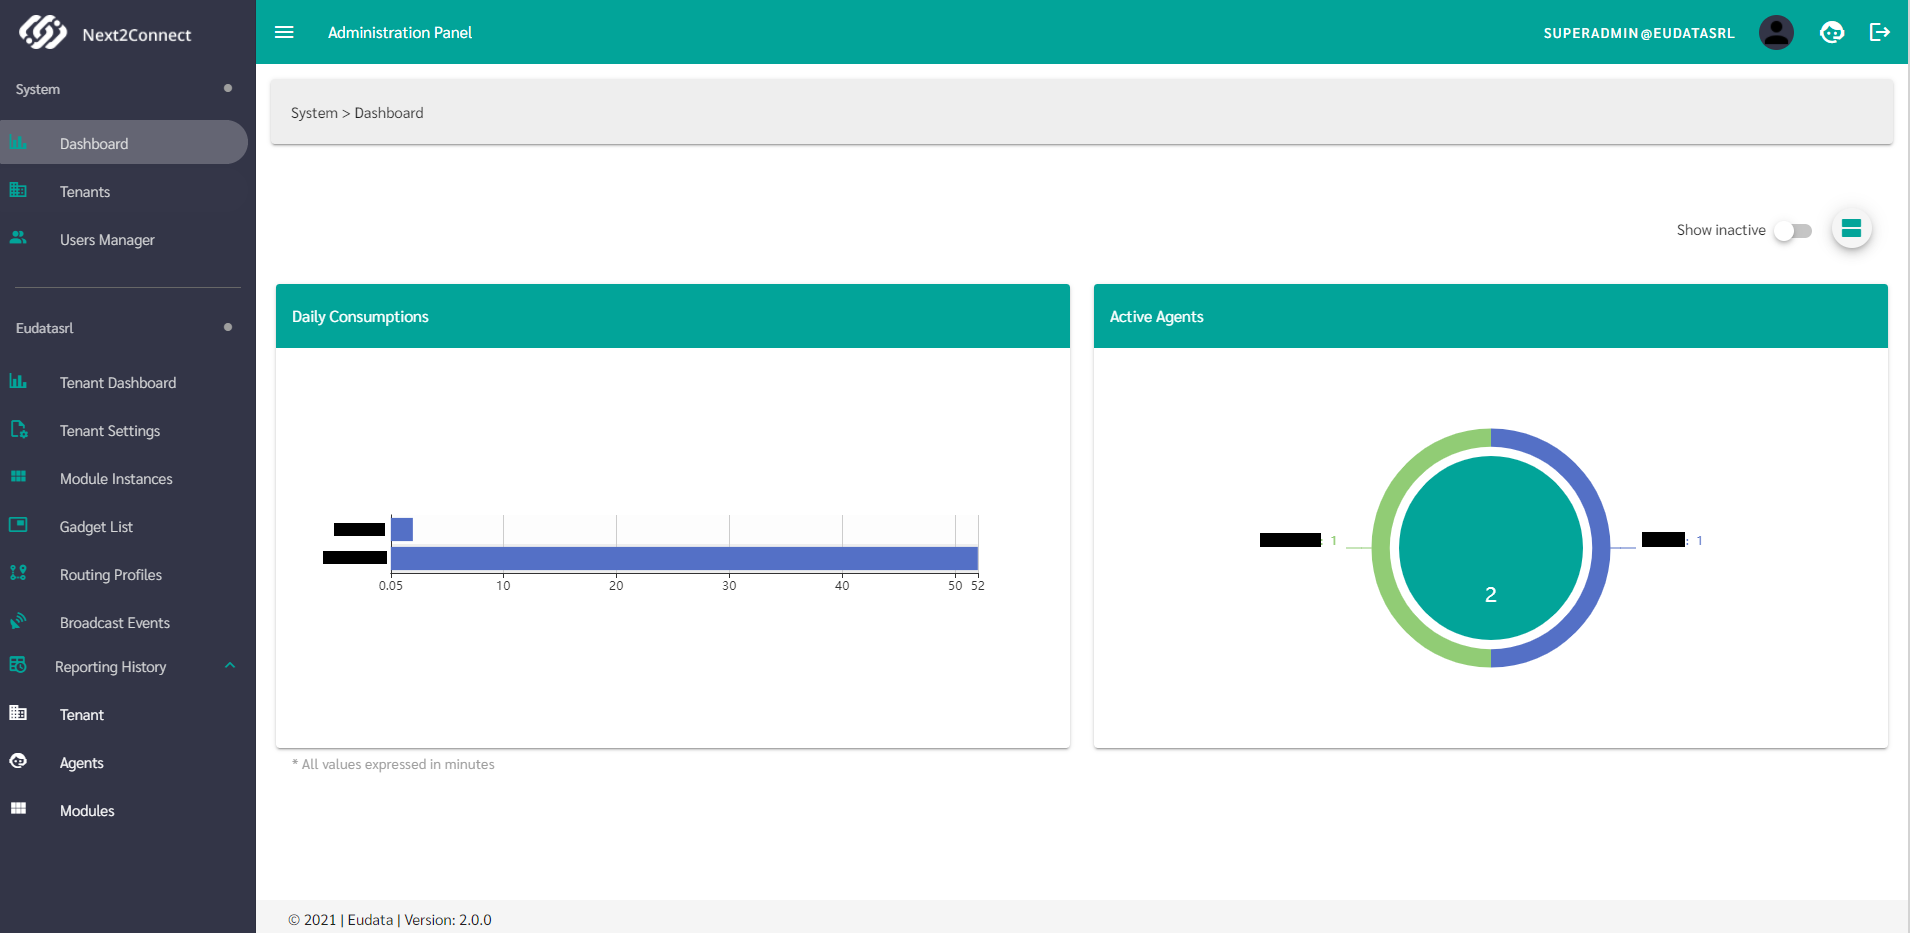
Navigate to Tenants in the left menu. You will find a pre-created tenant called MyComet, automatically set up by Connect Suite so you can complete the configuration with your data.
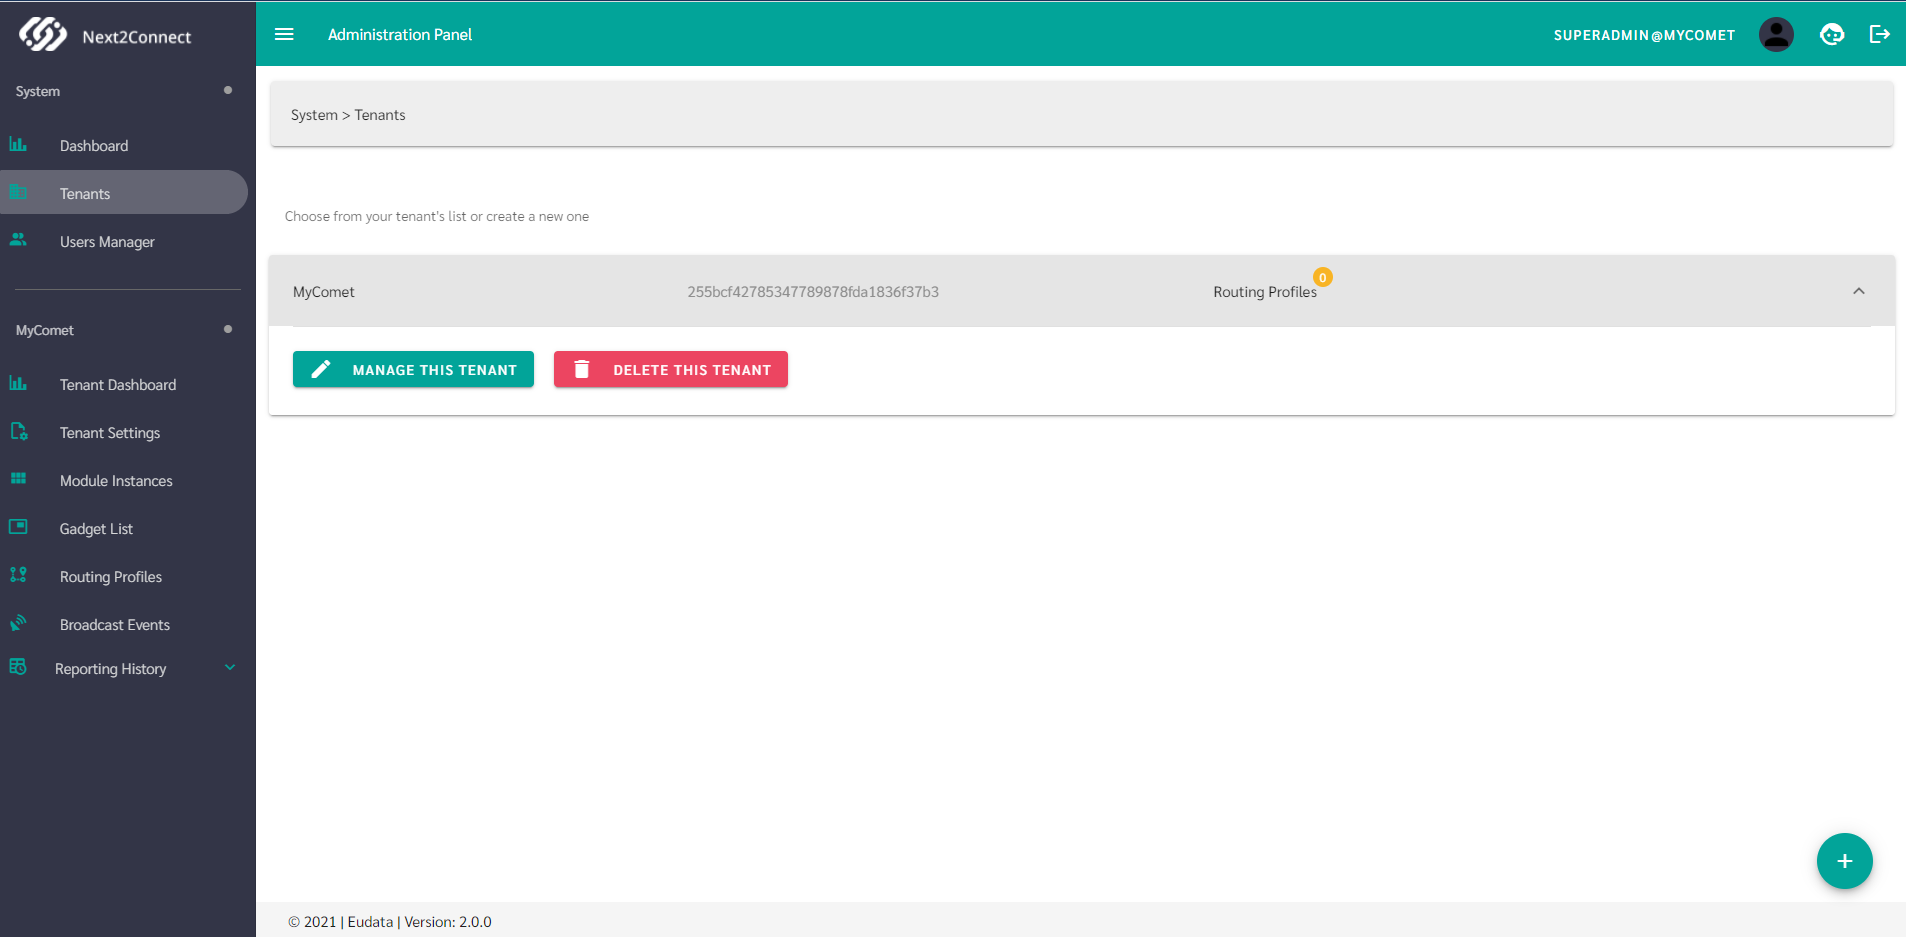
Click Manage this Tenant to open the configuration environment.
Configure Your Tenant
In Tenant Settings, you can customize:
- Label - the display name for your tenant (defaults to
MyComet). - Tenant Logo - URL to your company logo image.
- Tenant Custom Style - custom CSS to restyle the administration panel.
- Modules - the modules purchased and enabled for this tenant:
- CRAB Module: centralized customer data storage.
- Comet Module: outbound campaign scheduling and management.
The only mandatory field is Connect URL. Set it to the Amazon Connect instance URL retrieved during the AWS configuration, then click Update Tenant.
Module Instances
Modules are the integration layer that connects gadgets in the agent desktop to your Amazon Connect instance. Each module must be instantiated with your AWS account data before it can be used.
Navigate to Module Instances in the left menu. You will see the CRAB and Comet module settings panels.
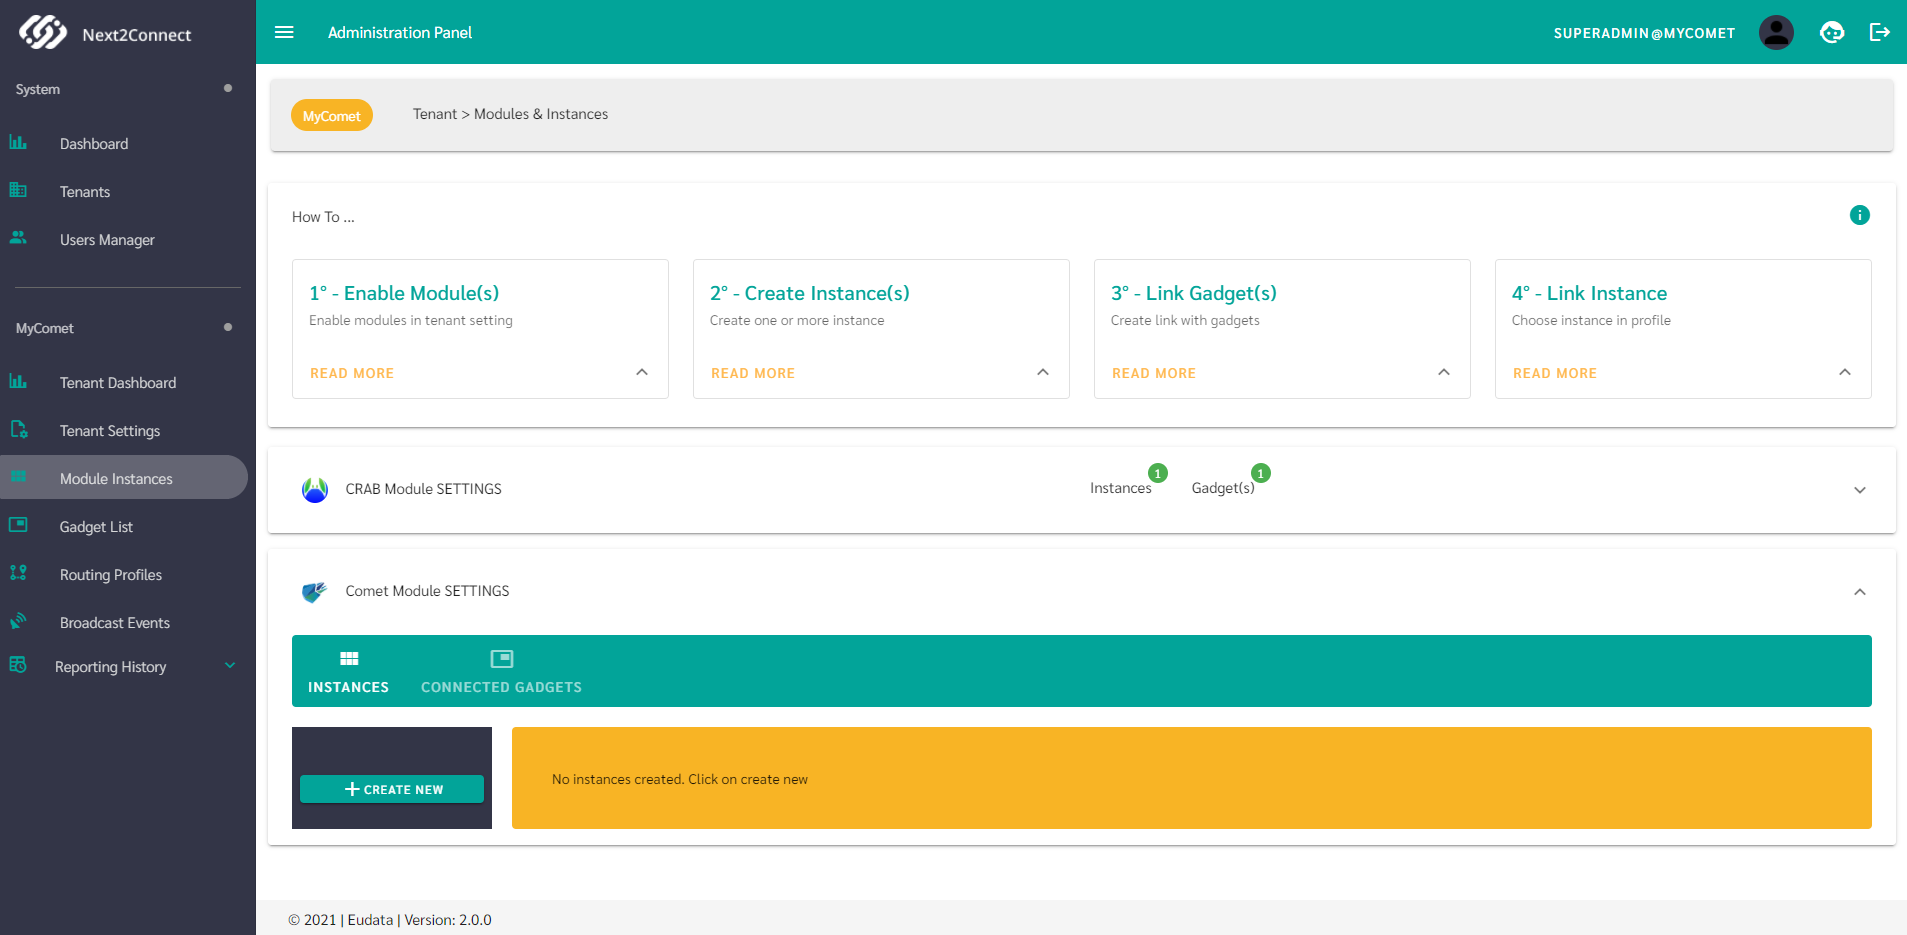
To create a new Comet module instance, expand Comet Module Settings and click + CREATE NEW. Fill in the following fields:
| Field | Description |
|---|---|
| Instance Name | Any name you prefer |
| connect_instance_region | The region code from your Connect ARN (e.g. eu-central-1) |
| connect_instance_id | The instance ID from your Connect ARN |
| connect_instance_cross_account_role | The full ARN of the IAM Role created earlier |
| crab_instance_id | Select the available CRAB instance to link customer data storage |
Click Create Instance when all fields are complete.
Set Up Routing Profiles
A Routing Profile in Next2Connect mirrors the routing profiles in your Amazon Connect instance. For each Amazon Connect routing profile you want to use in Next2Connect, you need to replicate its configuration here.
Start by opening the routing profile in Amazon Connect to retrieve its ARN from the page URL.

Click on the routing profile to open the edit page - the ARN is embedded in the URL of the browser.
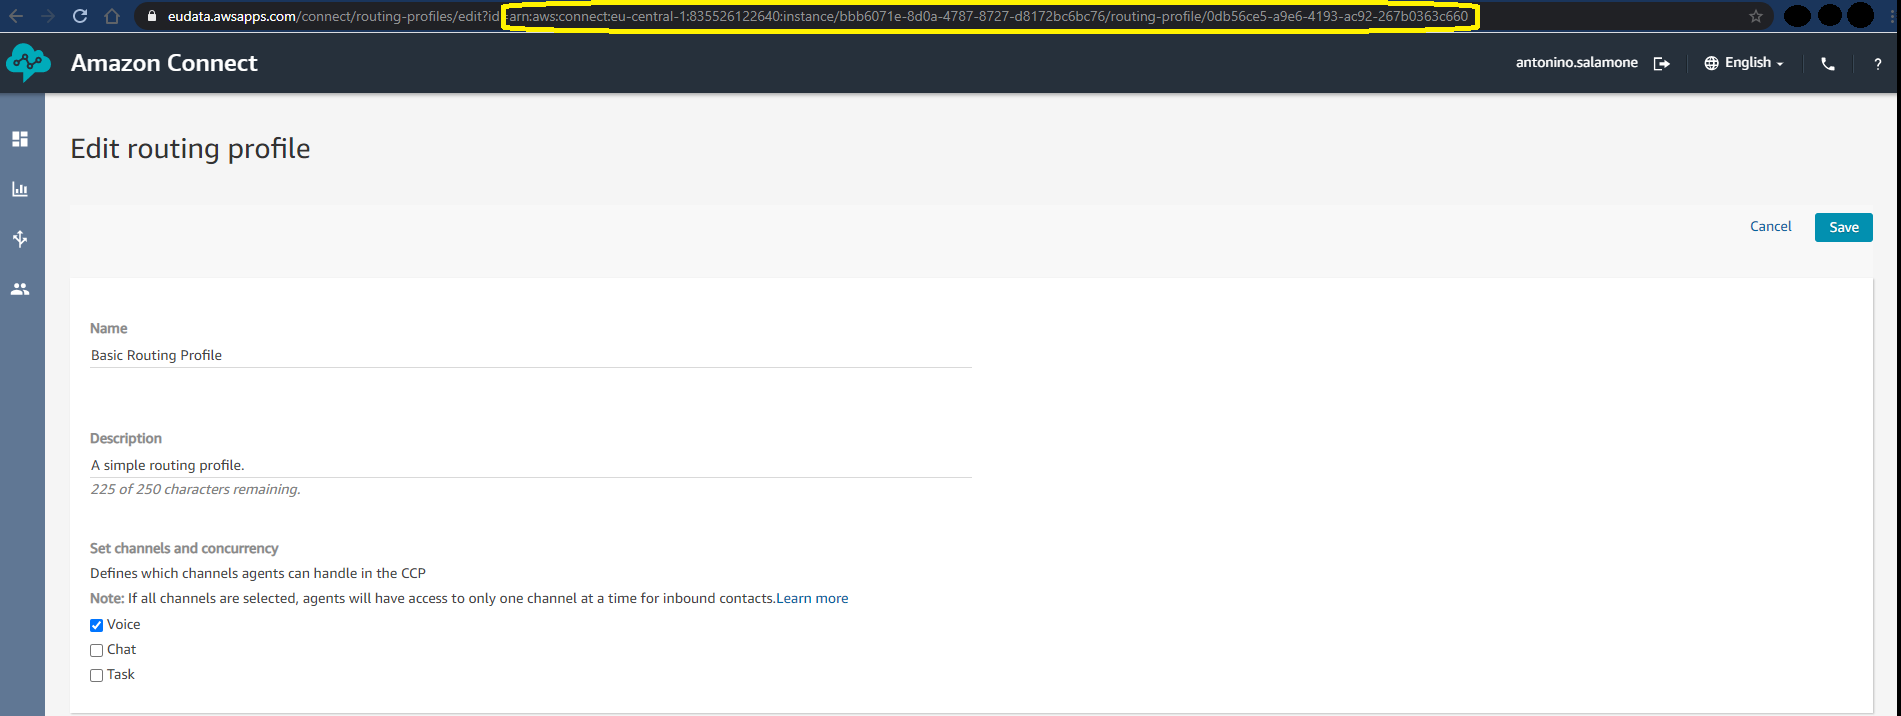
Back in the Next2Connect Administration Panel, navigate to Routing Profiles and click the + button to create a new profile.
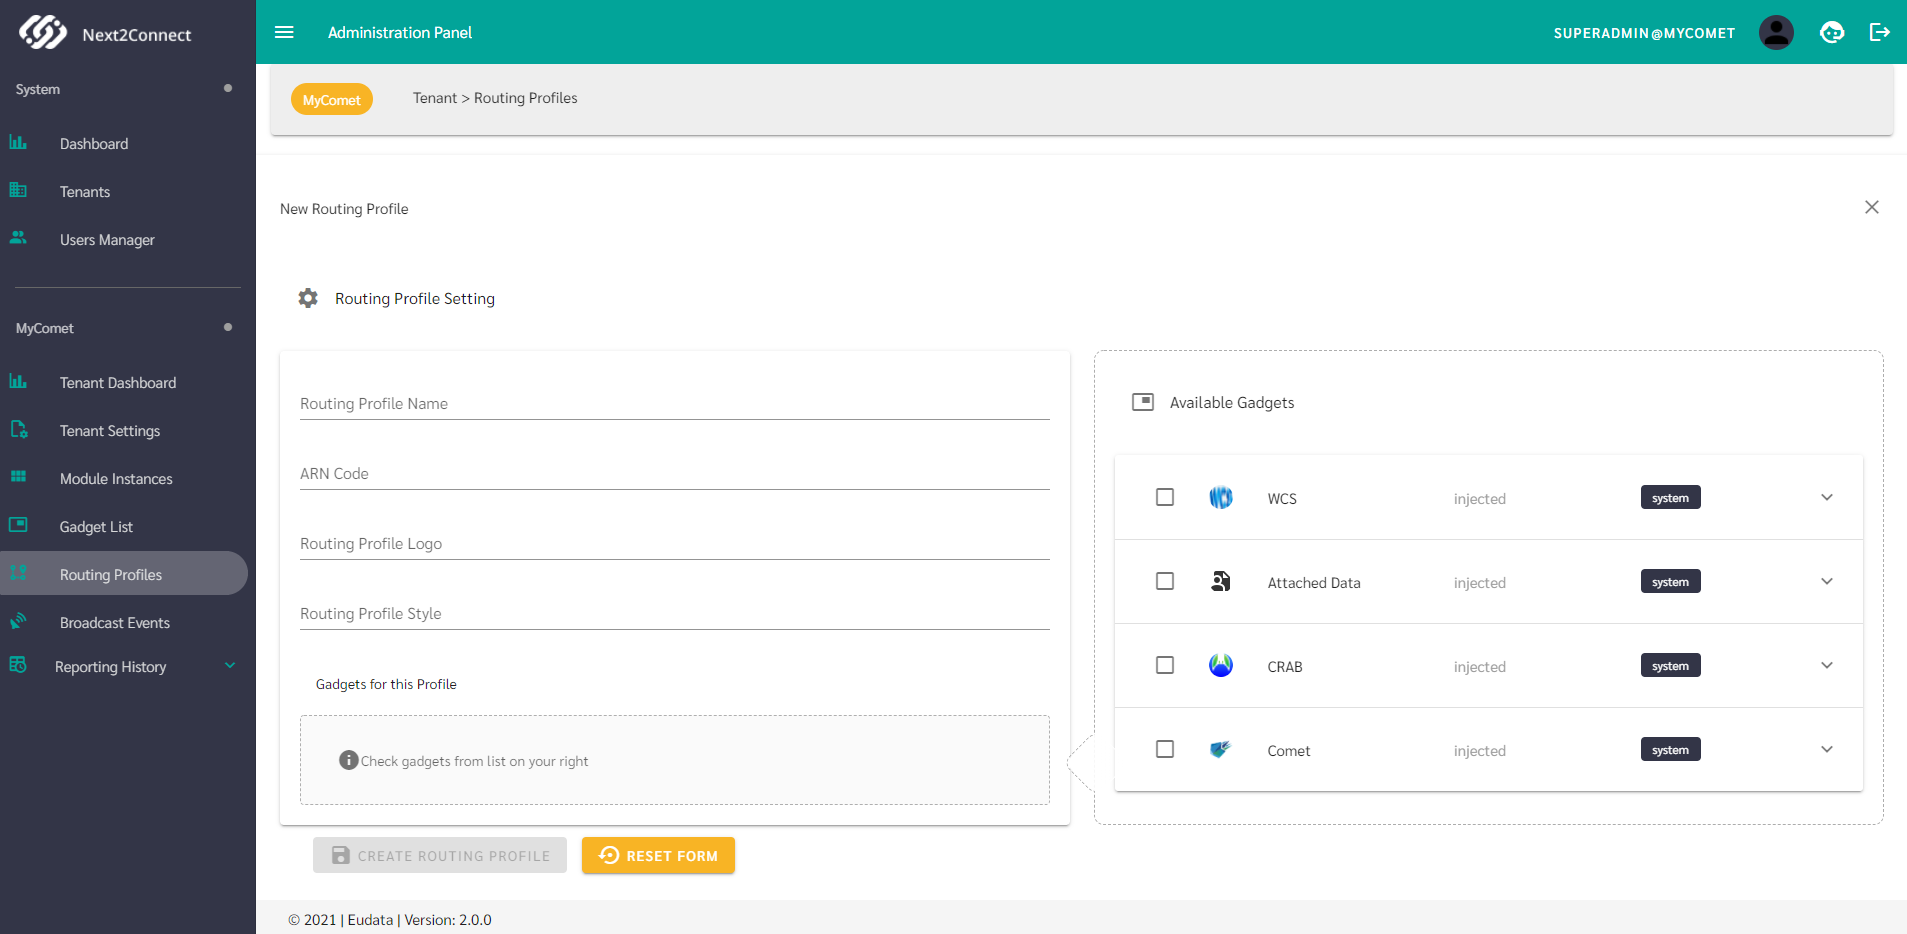
Fill in the form:
| Field | Description |
|---|---|
| Routing Profile Name | Must match the name configured in Amazon Connect |
| ARN Code | The routing profile ARN retrieved from the Amazon Connect URL |
| Routing Profile Logo | URL of an image to use as logo (optional) |
| Routing Profile Style | Custom CSS (optional) |
| Gadgets | One or more gadgets to load for agents using this profile |
Available system gadgets:
- CRAB Registry - customer registry, contacts, and metadata browser.
- Comet - outbound campaign scheduling and management.
- Attached Data - displays call data attributes for the current voice call.
When assigning CRAB or Comet gadgets, click on each one to select the associated module instance.
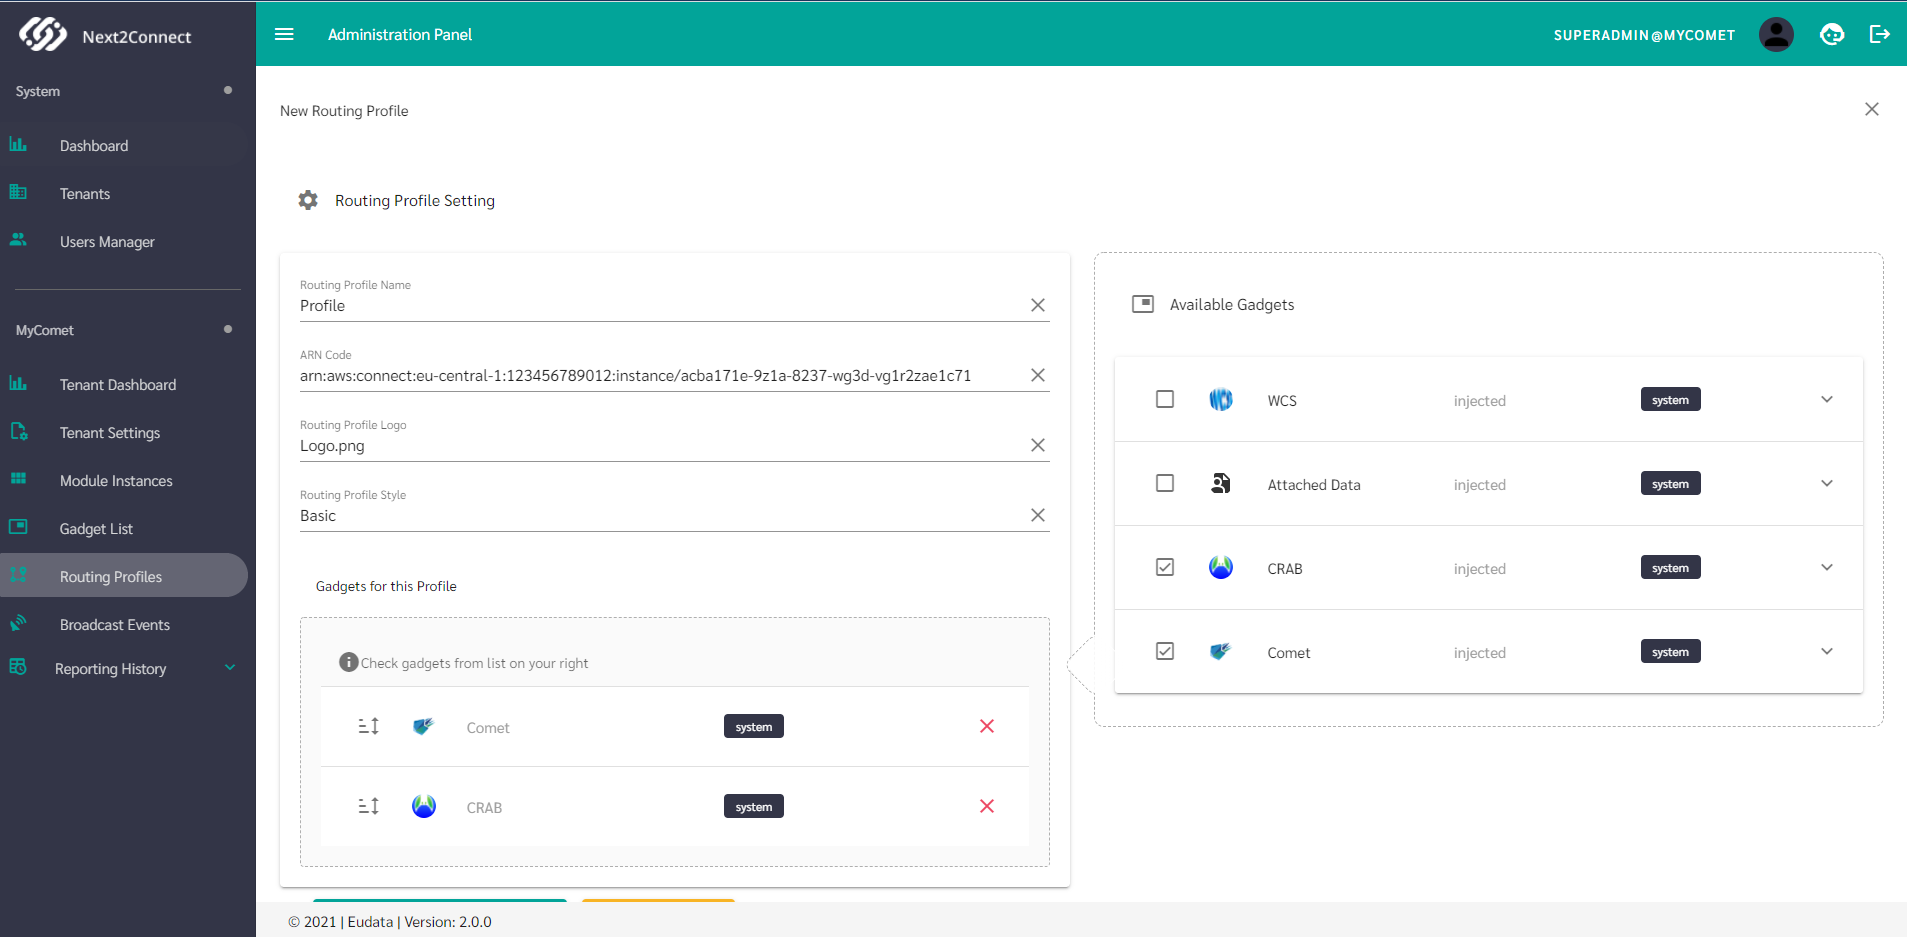
Routing profile examples:
- Contact center agent (handles inbound/outbound voice): enable CRAB Registry + Attached Data. The Comet gadget is not needed for agents who don't manage campaign configuration.
- Supervisor or campaign manager (no incoming calls): enable CRAB Registry + Comet.
Click Create Routing Profile to save.
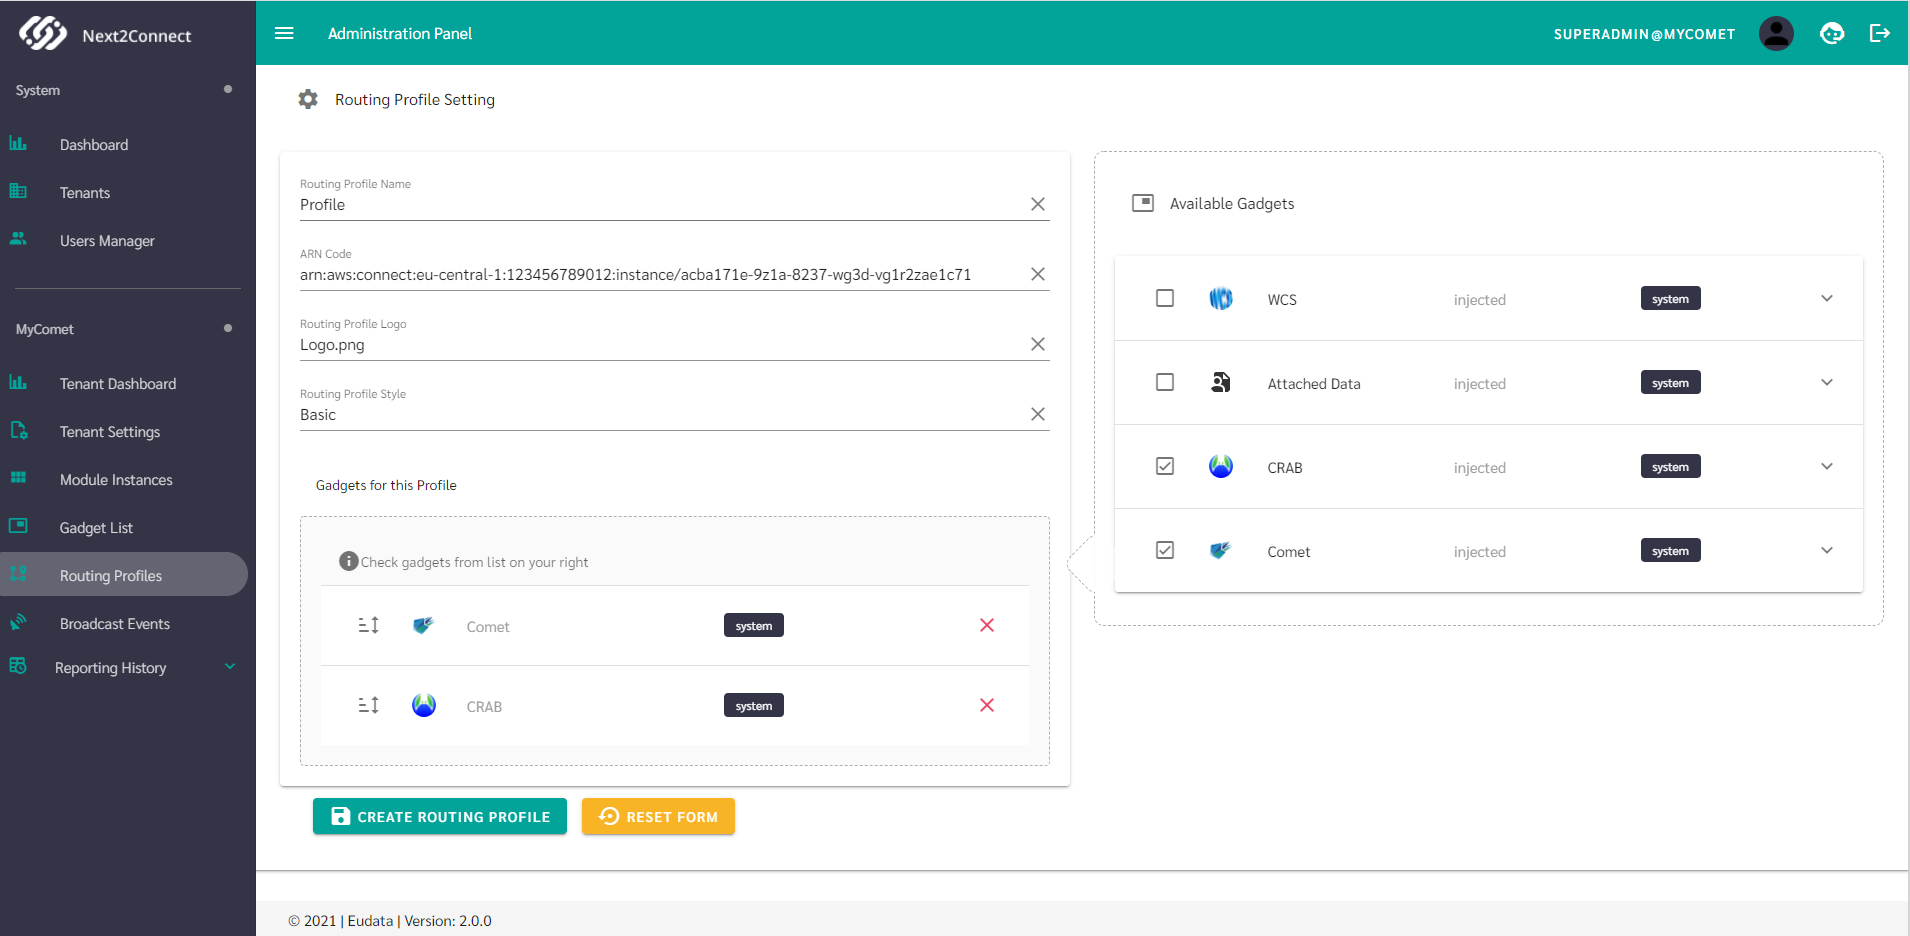
You can create multiple routing profiles with different gadget combinations. Once at least one routing profile is configured, agents can log in to the Next2Connect agent desktop.
Single Sign-On (SSO)
Connect Suite natively supports federated access via SAML2 and OIDC, covering both IdP-initiated and SP-initiated flows.
To request SSO activation, contact your sales representative at sales@eudata.com.